final reflection

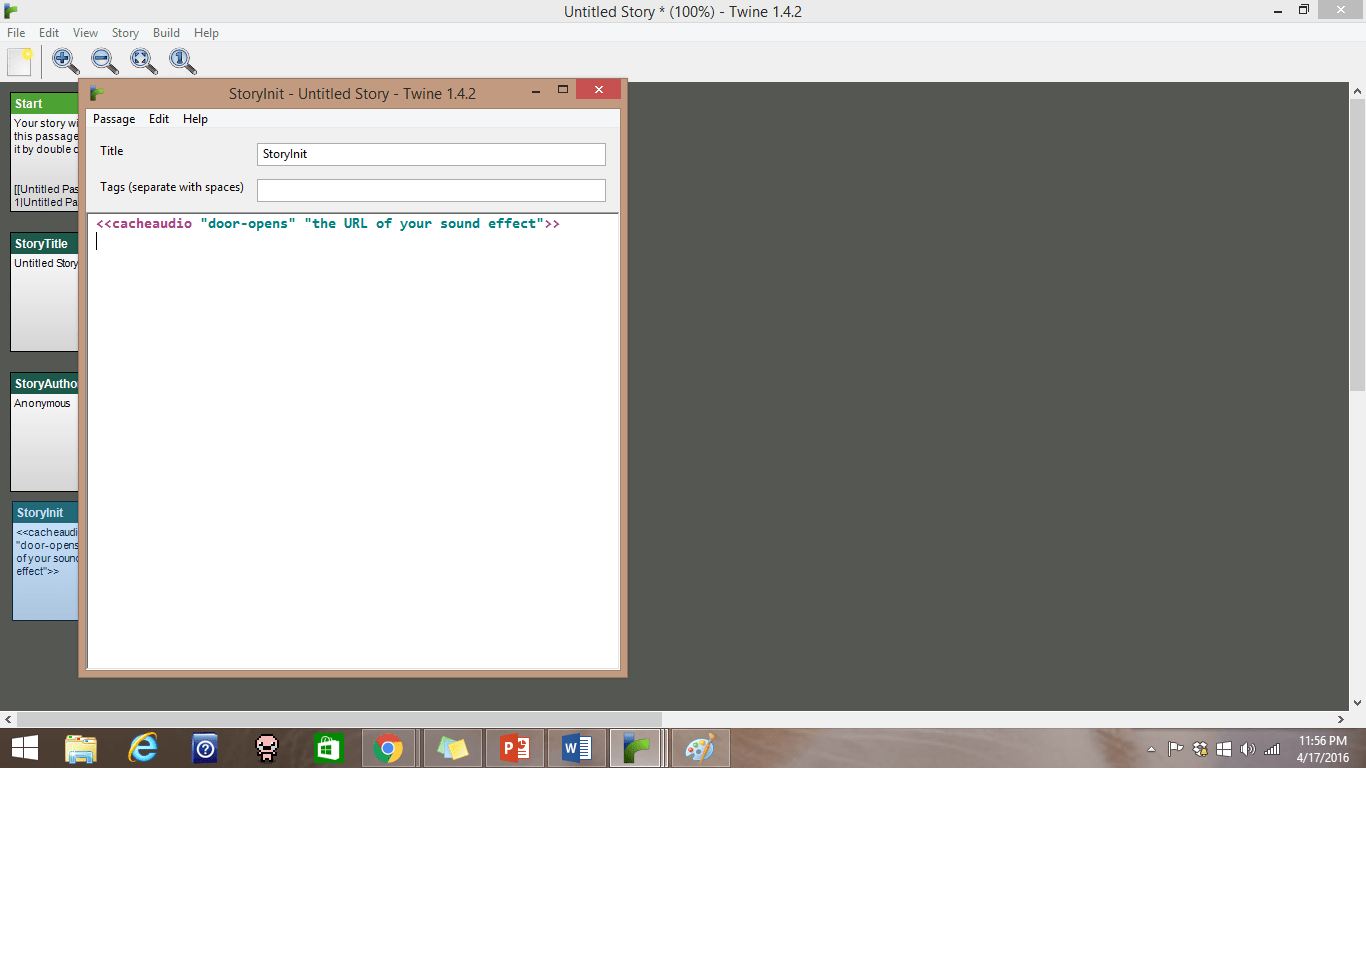
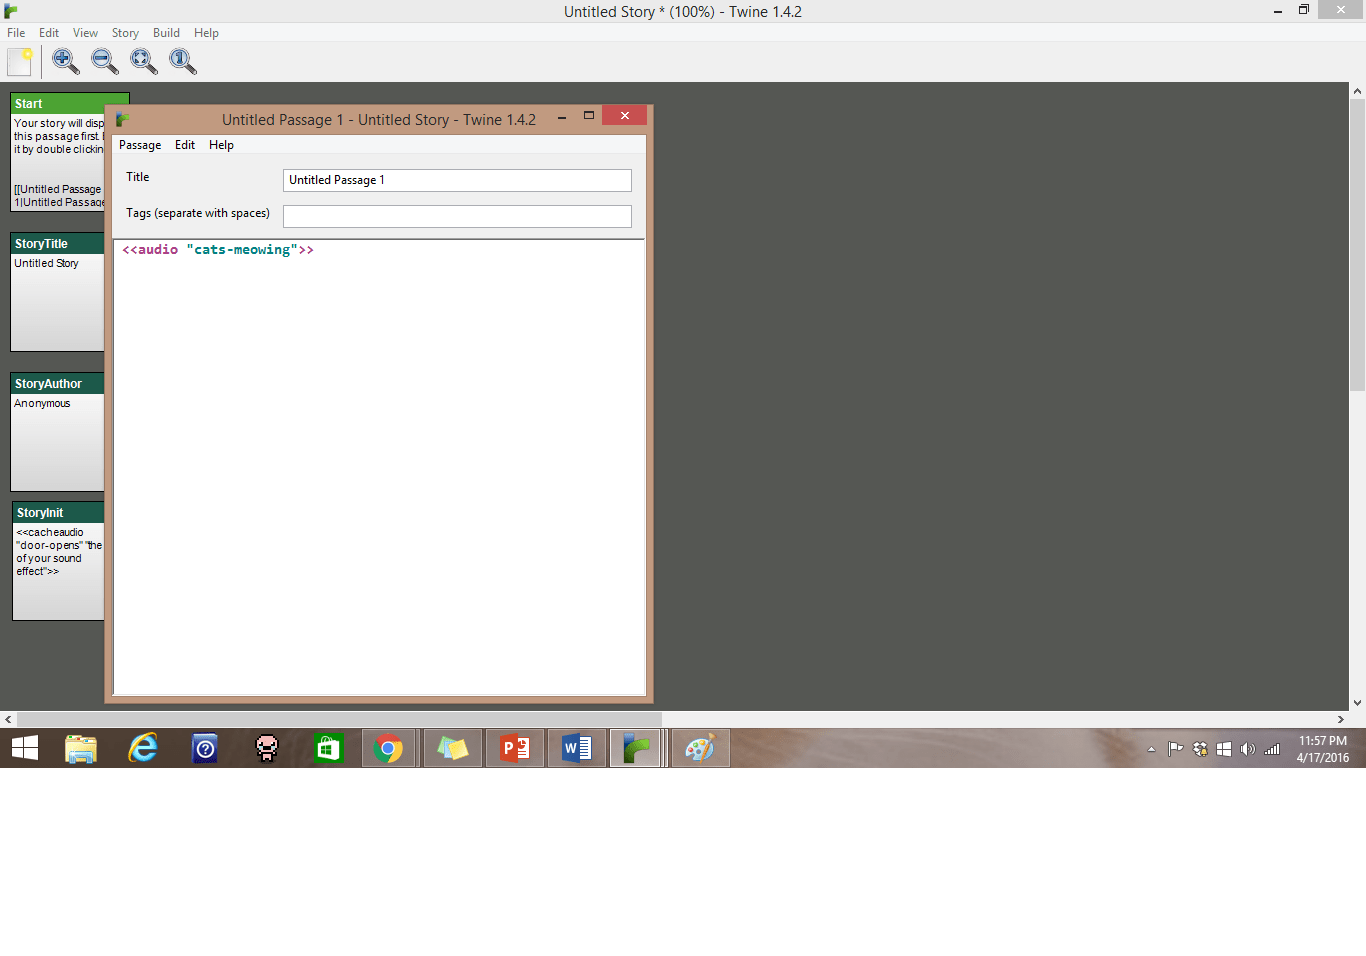
I think my final project was the easiest of all the projects. I was going to finish my original twine game but after about 20 minutes of it I realized there will never be an end to it so I decided to just do a new twine game since it would be so much easier to come to an ending. I think I spent about 2 hours all together making the actual game part. It was a lot easier than all the past projects put together, this included when I had to get pictures and videos from the Waterfront, but that was so difficult since I was on crutches and walking around was horribly difficult. Had I been able to walk that would have been the easiest project to complete. Since my final project was so much shorter than my other twine game it was a lot easier to make it seem filled with sounds and pictures. It was a lot easier when I realized how to give numerous options the same ending, that saved me a lot I time that I was able to use to try and figure out how to add sounds and pictures. Surprise surprise I could not figure out how to put either of them into my game. I think I spent three hours trying to figure out how to add sound and pictures to my game. I think the sound was a lot easier to add to the game because it was kind of like building off of using audacity. Sadly with the pictures it was a lot more difficult than the sound. With the sound when I figured out how to do it the first time I was just able to copy and paste the coding in and just delete the specific sound and add in the one I wanted for that page. Sadly with the pictures I just had absolutely no idea how to add the pictures in the first, second, or third time I added in a picture. It reminded me of a test…as soon as I finish one question I forget it to never know the answer again. It frustrated me a lot since I just continued to get confused at the same thing. I was really happy that I stayed for the entirety of class and Kelsey was able to help me add the sounds and pictures. Without her help I probably would not have been able to figure out how to add sounds or pictures and it would have been a very boring twine game…kind of like my first one.

Final Project Proposal

So for my final project I will be using only Adobe After Effects. I will also download certain plug-ins for it which include, Twixtor, Twitch, and Magic Bullet Looks. I want to create what is called a “montage” in the gaming community. Basically what this is is a compilation of the best highlights. These highlights may include, what they call a “killfeed”, which is four kills in a row which is extremely hard. I am going to order each clip with level of difficulty. For example, the hardest highlight that is pulled off will be first to start the montage with a bang. The ending will then be the second shot which will also allow the montage to end with a bang. Each clip will be edited separately using a variety of downloadable plug-ins and built in presets.

This project is the perfect timing, because a group of friends had recently asked me to edit something for them. They will be sending me their clips and I will order them in such a way that the user will never lose interest. Furthermore, I will also add music or other sound effects which will also help make the montage even better. Because this is the final project, I will also be using all types of effects that I have learned thus far. I don’t want to tell you right now because it might spoil the surprise though.

keyframes tutorial

Keyframes tutorial

I’m going to explain how to use keyframes in Premiere to create a moving title sequence…

  1. Create two titles, they are going to move opposite each other

2. in the Editing window select the title you want to work with first

3. under Effects Controls, and Motion, click the stop watch next to Position

4. enter the values you want, go to the end of the clip and enter the values you want for the end (how much you want the title to pan)

5. repeat 3-4 for the second clip, and switch the start and end values to move the second title opposite the first

6. select both clips and hit command+D to add fade in and out to your titles    

Screen Shot 2016-04-25 at 3.07.43 PM Screen Shot 2016-04-25 at 3.07.18 PM

Screen Shot 2016-04-25 at 3.08.17 PMScreen Shot 2016-04-25 at 3.08.06 PM

Twine tutorial: Linking boxes to the Start

For my tutorial I decided to show how to have a path restart from the beginning. A lot of my narrative paths would run into two choices and some would be an obviously bad choice for the person in the position to decide. When someone chose the bad choice and really needed to understand the repercussions, I would send them back to the beginning and have them learn their lesson.

1.) You have to start your narrative and get a lot of different paths going so a player doesn’t accidentally keep getting sent back to the start. In order to make sure of this a lot of parts must be created.

Screen Shot 2016-04-19 at 8.55.28 AM

2.) You have to create a box dedicated to sending a player back to the start . In this case, the player must click on a somewhat condescending “Absolutely not” to find out they are being sent back to the start. In order to link this box to the start, you must add |Start]] to the end of your blurb. It is important to note that this is very sensitive and will not link to the start if you accidentally use a lowercase “s” or misspell another box name you are trying to link to.

Screen Shot 2016-04-19 at 8.55.49 AM

3.) You now have a link back to the start. It may be difficult to notice with all the other boxes in the way, but an arrow will be pointing from your box to the intended linked box. In this screen shot I have highlighted the link I formed between the box named “2” and “Start.” Side note: the app that I used to be able to draw on the screen shot won’t publish the photo without a watermark. So it’s a little unclear where the arrow begins from the “2” box but it still gets the point across.

IMG_0261

Twine Tutorial

How to set the background of you webpage as an image in Twine

1.) Open up Twine and select and save the image you would like to use for your background.

2.) Once you have the image you would like to select, you need to go add a new stylesheet to your Twine project. You can add a new stylesheet by going to Story –>New –> Stylesheet

twine1

3.) This will take you to a new stylesheet that has not been filled in at all yet. Click on the stylesheet, and the empty one should look something like this.

twine2

4.)In the body section of the stylesheet between the curly brackets, indent and the place the tag “background-image:” in the stylesheet.

5.) After placing this tag here, you need to put the .jpg filename right after “background-image:”, but the image you want to use must be inserted using the code Twine uses to insert pictures. The format goes like this: [img[your_filename.jpg]]. And the whole statement must end with a semi-colon (;).

Twine3

6.)After this, you should have successfully inserted an image as your webpage’s background.


twine tutorial

Screenshot (27) Screenshot (28) Screenshot (29)

All the boxes can get very cluttered if you do not move them around and organize them.
1) the first thing you have to do is zoom in on the twine game so you can see it well. Or zoom out if you need a better look. The zoom in and zoom out are the plus and minus magnifying glasses.
2) The second thing you have to do it grab the box you want to move and click on it and hold.
3) The last thing you do it move the mouse wherever you want to move the box to. Make sure you are still clicking on the box though because if you click off it will not move.

Tutorial: How to make a clip black & white in premiere

This tutorial shows how to make a video clip black & white in Adobe Premiere.

  1. Import video footage into your video.
  2. Click on effects, then click on image control and select “Black & White”.Screen Shot 2016-04-18 at 6.22.24 PM
  3. Select the clip that you want to edit. Click on “Black & White” and drag your cursor over the clip that you want to edit. The “fx” on the clip should now be green instead of yellow.Screen Shot 2016-04-18 at 6.22.36 PM
  4. Now your clip that was previously in color should be black & white!Screen Shot 2016-04-18 at 6.22.49 PMScreen Shot 2016-04-18 at 6.23.02 PM

How to Add Sound to Twine Game

This tutorial will teach you how to add sound to your Twine game.

The easiest way to do this is to first cache the sound you want to use. This means that the sound effect will be loaded ahead of time and used when you want it to. This will prevent any delay in it playing and makes it easier to keep things organized as it allows you to name your sound clips.

First, to cache the sound you must add the following code: <<cacheaudio “name of sound effect” “the URL of your sound effect”>> to one of your passages. It makes most sense to add it to the StoryInit passage so the effect will load asap, as seen below.

screen2

Next, put the URL of the sound effect you wish to use in the code where it says “the URL of your sound effect” and the name you want to give your sound effect where it says “name of sound effect”. Pretty self explanatory, but here’s a visual using “cats meowing” as the name and “http://www.ousob.com/wavfiles/meow.wav” as the URL for the sound effect:

screen1

Now you can use the sound effect wherever you please. To do so, choose a passage you want to have the sound effect occur at and put in this code: <<audio “name of sound effect”>>. Change the “name of sound effect” to the name of the sound effect you just cached. Following the example, I posted <<audio “cat-meowing”>>  into Untitled Passage 1.

screen3

And that’s it! Happy Twining!

Twine- How to change background color multiple times throughout game

  1. In each text box, give certain places a “tag.” For example, in my game I had several different rooms. Each room was tagged with particular name.         Screen Shot 2016-04-17 at 11.33.39 PM
  2. When you finish tagging all of your text boxes, create a stylesheet for each tag. Screen Shot 2016-04-17 at 11.34.25 PM
  3. Tag each stylesheet with the same name you placed in the text boxes.Screen Shot 2016-04-17 at 11.34.04 PM
  4. Place the HTML code in under the “Body” section in the stylesheet.
  5. The HTML will look like this
    • body {
      background-color: blue;
      color: black;
      }
    • For most basic colors, you can just write the name of the color. If you want a specific color you must find the HTML color code, which can be done through a quick google search or through a software like Adobe Photoshop
  6. In the end, you should have multiple stylesheets that will automatically link to the tags in your text boxes.                                                   Screen Shot 2016-04-17 at 11.34.39 PMScreen Shot 2016-04-17 at 11.32.58 PM